 |  |

There are several reasons you might want to create a dialog box in Perl/Tk. This section will show you what your choices are and how to configure dialog boxes.
The most basic widget provided in Tk to create a dialog box is Dialog. It's perfect when you need a quick way to display information or get an answer from a user.
$answer = $mw->Dialog(-title => 'Please Reply',
   -text => 'Would you like to continue?',
   -default_button => 'yay', -buttons => [ 'yay', 'nay'],
   -bitmap => 'question' )->Show( );
if ($answer eq 'yay') {
  # ... do something ...
}
Figure 23-4 shows the output from our code snippet.
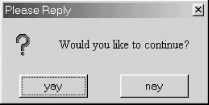
Instead of calling Show immediately, you can save a reference to the dialog and reuse it throughout your application. The options you can use with a Dialog are as follows:
If you need only a one-shot dialog, you can use the messageBox method. The options are slightly different, but the result looks almost the same, shown in Figure 23-5. Keep in mind that every time you call messageBox, a new Dialog is created and there is no Show method.
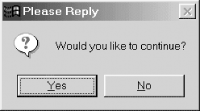
Like a Dialog widget, messageBox returns the selected Button's string, but its case may vary depending on your operating system. Therefore, it's best to treat the response in a case-insensitive manner.
The messageBox Buttons are specified with the -type option, so, for example, a -type of AbortRetryIgnore produces three Buttons with the labels Abort, Retry, and Ignore. Any of these Button labels can be specified as the default Button. Once again, case issues are present; see -default. It's anticipated that these case issues will be taken care of in Tk 800.024.
   $answer => $mw->messageBox(-title => 'Please Reply',
     -message => 'Would you like to continue?',
     -type => 'YesNo', -icon => 'question', -default => 'yes');
The options used with messageBox are as follows:
The DialogBox widget is a more customizable version of Dialog. Instead of just a text message above the buttons, you can put anything you'd like in that area. There are only three options available with DialogBox:
After creating the DialogBox, you can call the add method to insert items, and pack will display the widgets inside the dialog. Here's an example of creating a login DialogBox:
require Tk::LabEntry;
   ...
$db = $mw->DialogBox(-title => 'Login', -buttons => ['Ok', 'Cancel'],
                     -default_button => 'Ok');
$db->add('LabEntry', -textvariable => \$uname, -width => 20,
         -label => 'Username', -labelPack => [-side => 'left'])->pack;
$db->add('LabEntry', -textvariable => \$pw, -width => 20,
          -label => 'Password', -show => '*',
          -labelPack => [-side => 'left'])->pack;
$answer = $db->Show( );

if ($answer eq "Ok") {
  print "Username = $uname, Password = $pw\n";
}
Figure 23-6 shows the outcome.

When working with a graphical application, it makes sense to display errors to your user in a graphical manner. Normally if something goes wrong in your application, Tk::Error is called, and the error message(s) is printed on the console where the program was run from. This is a less-than user-friendly way to communicate to your users that something is wrong. By including use Tk::ErrorDialog in your application, you will start getting error messages in dialog boxes.
This magic happens because ErrorDialog overrides Tk::Error with a version of its own. If you're unsatisfied with either version of Tk::Error, write your own. It's called with three arguments:
my ($w, $error, @msgs) = @_;
$w is a widget reference, $error is the current error message, and @msgs is an array of traceback messages.
Figure 23-7 shows an example error dialog, when we used the wrong default button to create another dialog.
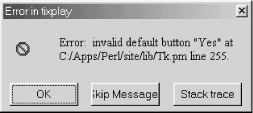
Execution of your application doesn't halt when an error shows up, but the user is required to click through any error messages that are displayed.
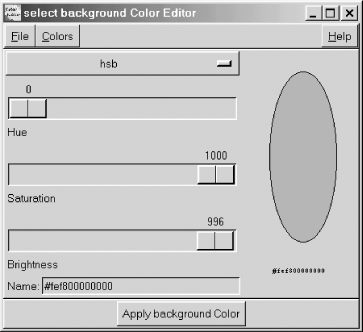
There are times you would like the user to select his own color, perhaps when customizing the look of the application windows or when drawing text in a Text or Canvas widget. Using chooseColor, you can pop up a dialog box to select a color name or hexadecimal color number. This returns the color or undef to $color. On Win32 chooseColor calls a native dialog (Figure 23-8), and on Unix, it calls Tk::ColorEditor (Figure 23-9).
$color = $widget->chooseColor(-title => 'string', -initialcolor => color);
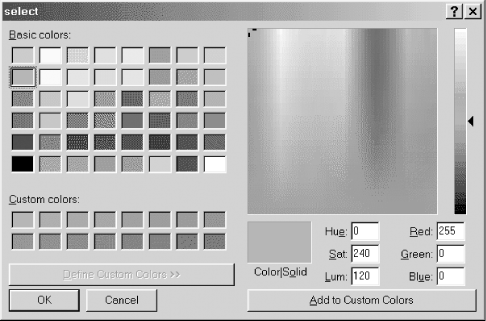
Valid options are:
Often you will want the user to locate an existing file or the location for a new file on her filesystem. The methods getOpenFile and getSaveFile let you do this easily. Figure 23-10 illustrates the getOpenFile dialog.
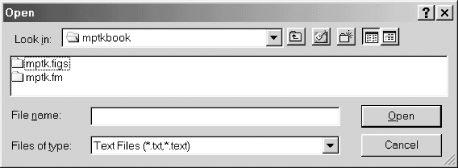
To give you a quick idea of how these are used, getOpenFile is most commonly associated with the "Open" command in the File menu, and getSaveFile is usually associated with the "Save as..." command in the File menu. In either case, if the user selects a file, both methods return the full pathname of this file. If the user cancels the operation, both methods return an undefined value.
The easiest way to invoke them both is:
my $file = $mw->getOpenFile( );
&do_something($file) if defined $file;

my $sfile = $mw->getSaveFile( );
&do_somethingelse($sfile) if defined $sfile;
The only real difference between the two methods is the error handling they perform. For instance, if you try to select a preexisting file from the Save dialog, you will be asked if you want to overwrite that file. Your program is still required to actually create or open the returned filename; these dialogs are just a consistent way of requesting the information from the user.
If you would like to customize your open or save dialog, use one or more of the following optional arguments:
my $types = [
  ['Text Files',       ['.txt', '.text']],
  ['Java Source Files', '.java'          ],
  ['C Source Files',   '.c',      'TEXT'],
  ['GIF Files',        '.gif',          ],
  ['All Files',        '*',             ],
];

my $filename = $mw->getOpenFile(-filetypes => $types);

Copyright © 2002 O'Reilly & Associates. All rights reserved.